Table of Contents:
Overview
This white paper is intended to outline using Project Insight’s invoice export to QuickBooks feature and QuickBooks’ corresponding invoice import feature.
Project Insight exports individual invoices into QuickBooks’ “Intuit Interchange Format” or .iif file format.
Project Insight will export certain information to the .iif format, but it is not intended to be a seamless integration. Each exported invoice subsequently imported into QuickBooks should be reviewed and adjusted per your company’s invoicing policies. The following information will be exported:
|
Type
|
Field Name
|
Description
|
|
Distribution Lines:
|
|
|
TRNS
|
|
|
|
SPL
|
|
|
|
ENDTRNS
|
|
|
IDs:
|
|
|
TRNSID
|
A unique number that identifies the transaction.
|
|
|
SPLID
|
A unique number that identifies the distribution line in
the transaction.
|
|
Invoice Header
Detail:
|
|
|
TRNSTYPE
|
A keyword that indicates the type of transaction. The
keyword in this field must match the keyword in the TRNSTYPE field for the
transaction. The keyword for invoices is INVOICE
|
|
|
DATE
|
The date of the transaction. The date is always in
MM/DD/YY format. For example, 1/30/94.
|
|
|
ACCNT
|
The name of the account assigned to the transaction. This
will always be Accounts Receivable for the TRNS distribution line and the
Custom Code Field for the line item on the Project Insight created
invoice. The custom code comes from
Project Insight’s Time and Expense Codes setup in the Global Settings
administration.
|
|
|
NAME
|
The name of the customer
|
|
|
AMOUNT
|
The amount of the transaction. Debit amounts are always
positive, credit amounts are always negative.
|
|
|
DOCNUM
|
The number of the transaction. For invoices, the number is
the invoice number if entered; otherwise the invoice number will be
blank. The DOCNUM will only be present
on the TRNS distribution line item
|
|
|
MEMO
|
The memo text associated with the transaction. In this
case the Line Item description you entered when creating the line item in
Project Insight
|
|
|
CLEAR
|
Indicates whether the transaction has cleared. This will
always be N which means No. The transaction hasn't cleared.
|
|
|
TOPRINT
|
Indicates whether the invoice has been marked as "To
be printed." This will always be Y meaning Yes the invoice is marked
"To be printed."
|
|
|
ADDR1
|
Billing Address1 = Company Name from Project Insight’s
company administration
|
|
|
ADDR2
|
Billing Address2 = Company Address 1 from Project
Insight’s company administration
|
|
|
ADDR3
|
Billing Address3 = Company Address 2 from Project
Insight’s company administration
|
|
|
ADDR4
|
Billing Address4 = Company City,
State, and Zip Code fields from Project Insight’s company administration
|
|
|
DUEDATE
|
The due date of the bill payment or invoice payment. The
date is always in MM/DD/YY format. For example, 1/30/98. Since Project
Insight does not track payment terms for companies, this field is always
equal to the invoice date.
|
|
|
PAID
|
Indicates whether an invoice has been paid in full. This
field is always N meaning the invoice is not paid.
|
|
|
PONUM
|
The customer's purchase order number. This number is taken
from the Purchase Order field in Project Insight’s invoice add input screen.
|
|
|
SHIPDATE
|
The shipping date. The date is always in MM/DD/YY format.
For example, 1/30/94. This will always be the same as the invoice date.
|
|
Invoice Line Item
Detail:
|
|
|
TRNSTYPE
|
A keyword that indicates the type of transaction. The
keyword in this field must match the keyword in the TRNSTYPE field for the
transaction. The keyword for invoices is INVOICE
|
|
|
DATE
|
The date of the transaction. The date is always in
MM/DD/YY format. For example, 1/30/94.
|
|
|
ACCNT
|
The name of the account assigned to the transaction. This
will always be Accounts Receivable for the TRNS distribution line and the
Custom Code Field for the line item on the Project Insight created invoice. The custom code comes from Project
Insight’s Time and Expense Codes setup in the Global Settings administration.
|
|
|
AMOUNT
|
The amount of the transaction. Debit amounts are always
positive, credit amounts are always negative.
|
|
|
DOCNUM
|
The number of the transaction. For invoices, the number is
the invoice number if entered; otherwise the invoice number will be
blank. The DOCNUM will only be present
on the TRNS distribution line item
|
|
|
MEMO
|
The memo text associated with the transaction. In this
case the Line Item description you entered when creating the line item in
Project Insight
|
|
|
CLEAR
|
Indicates whether the transaction has cleared. This will
always be N which means No. The transaction hasn't cleared.
|
|
|
QNTY
|
The number of items sold.
|
|
|
PRICE
|
The unit cost of the item.
|
|
|
INVITEM
|
The type of items sold. This is the Item Type in
QuickBooks and is the Custom Code Field for the line item on the Project
Insight created invoice. The custom
code comes from Project Insight’s Time and Expense Codes setup in the Global
Settings administration.
|
|
|
TAXABLE **
|
Indicates that a line item on an invoice is taxable. Since
Project Insight does not have the ability to track taxable vs. non-taxable
items, this field is always N meaning the line item is not taxable.
|
|
|
EXTRA **
|
Adds additional information about the distribution line.
This field will contain AUTOSTAX on the separate SPL sales tax line
identifying it as a sales tax item as the automatic tax rate you set up for
your QuickBooks company.
|
** Special note for sales taxes. QuickBooks requires a designation of whether the customer is taxable or not on each invoice. Project Insight does not track the taxability of companies at this time. As such, this will always be imported as -0- and required manual adjustment by the QuickBooks invoicing person to set the invoice and/or specific line items to be taxable.
Setting up Project Insight to use QuickBooks export
To use the QuickBooks export feature of Project Insight, there are several administrative setup items needed in order to facilitate the feature.
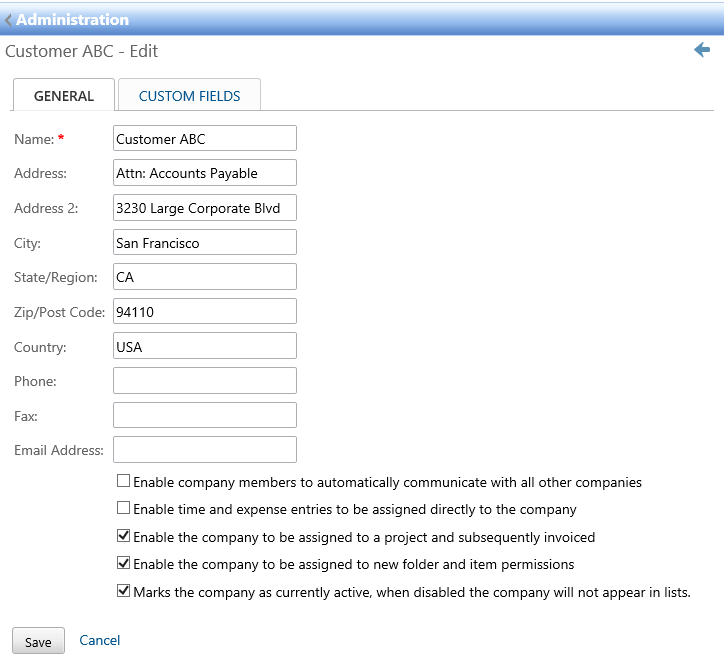
Company Setup
While setting up a company in Administration/Companies that will have invoices created for it, it is important to fill in the following company fields exactly as they appear in your QuickBooks file:
Global Settings – Time & Expense Codes
When setting up Time and expense codes, each code that you want to be able to use for invoice line items must be checked as such (see green highlights in the screen shot below). Time and expense codes that are not designated as invoice line items can still have time entered against that code. These codes are available to be “rolled up” into an invoice line item time code.
Additionally, your QuickBooks Item (used when creating QuickBooks invoices) should be entered into the Custom Code text box.
Setting the Custom Codes to work with QuickBooks
In order to use the QuickBooks export, you’ll need to enter a custom code for each Inv Time Line Item and Inv Exp Line Item (see yellow highlights in the screen shot below). Setting your Custom Codes is a three part function. First you need to enter in the income account (P&L), next enter “pipe” separator (no spaces before or after), and then enter the QuickBooks Item used when creating QuickBooks invoice line items. Use the following format:
IncomeAccount:IncomeSubAccount|Item:SubItem**
NOTE: When exporting time entries you can optionally add the payroll wage item as a third value by adding an additional “pipe” separator as in the example below.
IncomeAccount:IncomeSubAccount|Item:SubItem|PayrollWageItem:PayrollWageSubItem**

** If you use QuickBooks “Sub” accounts or sub items feature separate the Account or Item from it’s sub by using a colon (:)
NOTE FOR SYSTEMS USING THE QUICKBOOKS ACCOUNT NUMBER FEATURE:
If you are using the QuickBooks account number feature (this is a Company, Accounting preference), it is only necessary to include the account number in the Custom Code. The Custom Code syntax would be:
IncomeAccountNumber:IncomeSubAccountNumber|Item:SubItem
For example:
For Time Code 1 in the screen shot above, if the “All Income” GL account had the account number 4000 assigned to it and the “Programming Income” GL sub-account had the account number 4010 assigned to it, the Custom Code syntax would be:
4000:4010|Programming:Internet
Where 4000 is the main GL income account. 4010 is the GL sub-income account. Programming is the item. Internet is the sub-item
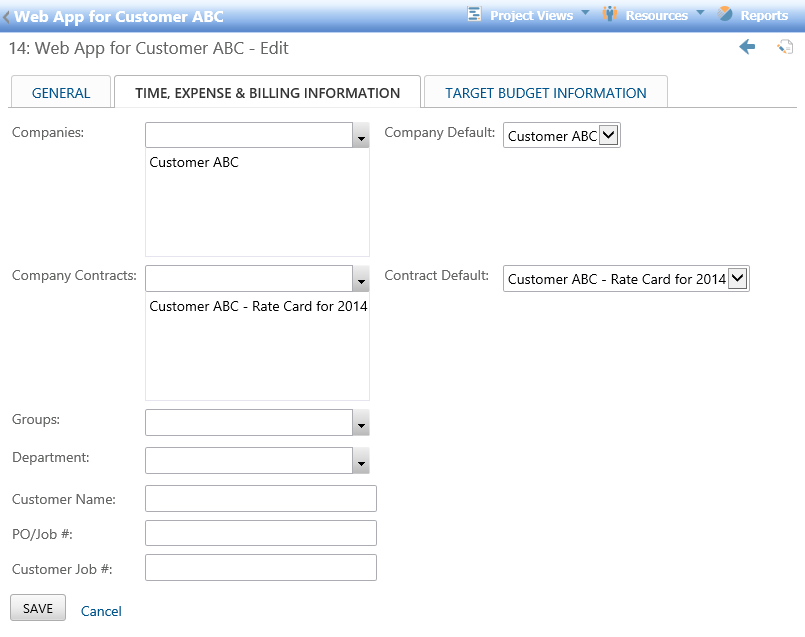
Project Setup
In order to use the invoicing feature of Project Insight and subsequently the QuickBooks export feature, you need to assign a company to each project for which you wish to create invoices.
Creating Invoices to use QuickBooks export
The last step needed before exporting to QuickBooks is creating the invoice itself. In order to activate the QuickBooks export button (i.e. make it available for use), ALL the invoice line items must be attached to an Invoice Time or Expense line item.
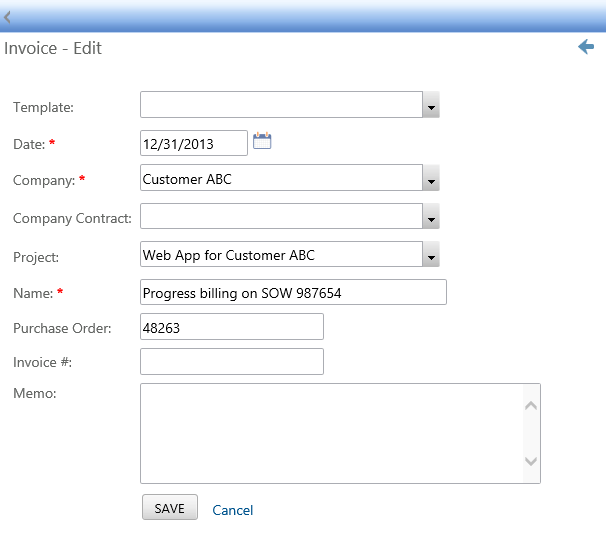
Add an Invoice
The first step is to add an invoice. In the add invoice screen, fill in the required fields and if you know the customer’s purchase order number, add it to this screen in the Purchase Order field as it will be included in the QuickBooks export. Additionally, if you have it, you can add the QuickBooks invoice number at this point in the Invoice # field. This field will also be included in the QuickBooks export. IF THE PURCHASE ORDER AND/OR THE INVOICE # FIELDS ARE NOT FILLED IN, THESE FIELDS WILL BE BLANK IN THE IMPORT AND WILL NEED TO BE MANUALLY ENTERED IN QUICKBOOKS’ CREATE INVOICES SCREEN.
Add Line Items
Once you gave an invoice, you need to add line items.
You can add line items automatically using one of the built in line item generators
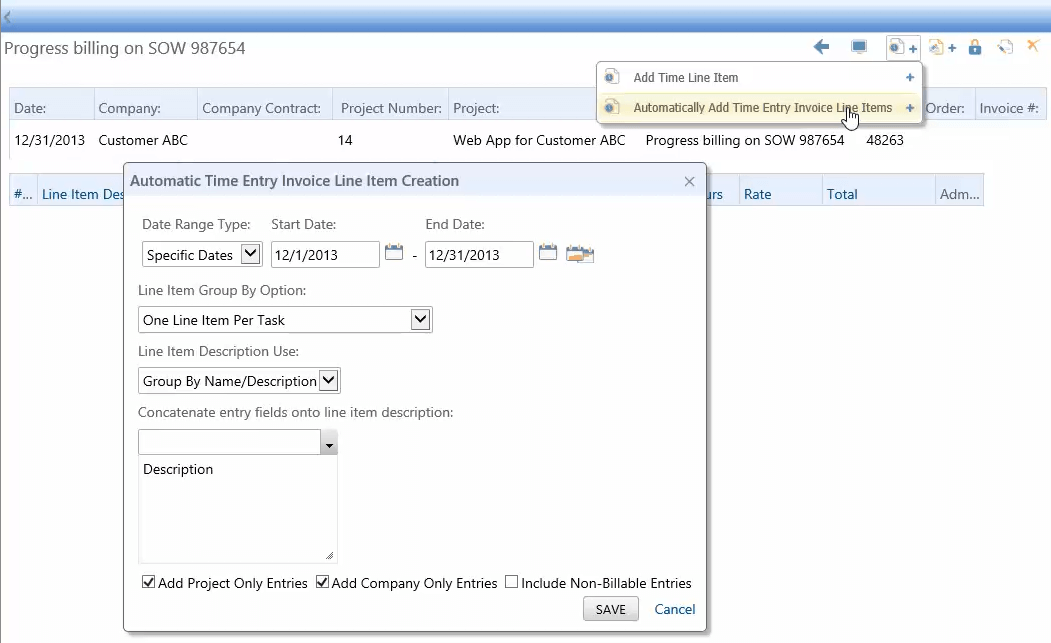
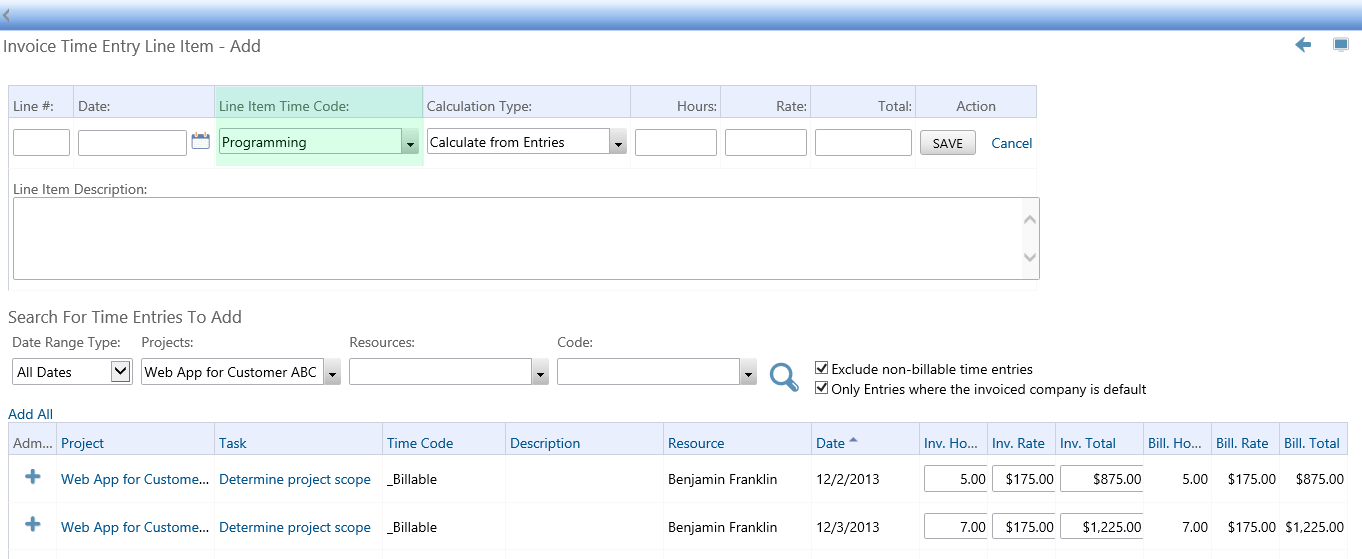
When adding line items to an invoice you MUST have a Line Item Time Code (
see green highlight in the screen shot below) or you will not be able to use the QuickBooks export feature. Once all line items are added to the invoice, you can export the invoice to a QuickBooks .iif file.
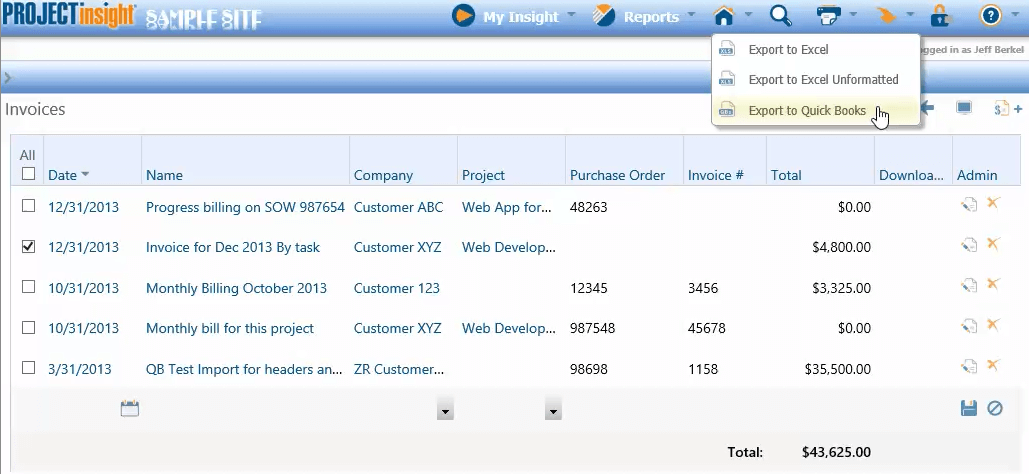
Export to QuickBooks .iif File
From the invoice detail screen, select The Export to QuickBooks option from the top menu. The export routine will prompt you to run the file or save it. Choose save and save the file in your desired location. You can then import that file into QuickBooks using QuickBooks’ “Import > IIF Files…” under the File menu. Project insight will only export the summary line item (in bold) along with the invoice header information.

Unsupported QuickBooks Fields
Project Insight does not support all fields in the QuickBooks that transfer from the QuickBooks customer profile to the invoice. IF ANY INFORMATION IS REQUIRED ON YOUR INVOICES BASED ON UNSUPPORTED INFORMATION, THIS INFORMATION WILL NEED TO BE ADDED MANUALLY TO THE INVOICE ONCE IT IS IN QUICKBOOKS. Unsupported QuickBooks Customer fields are:
- Address Info Tab
- Mr./Ms./…
- First Name
- M.I.
- Last Name
- Contact
- Phone
- Fax
- Alt. Ph.
- Alt. Contact
- E-mail
- Ship To
- Additional Info Tab – no fields on this tab are supported
- Payment Info Tab – no fields on this tab are supported
- Job Info Tab – no fields on this tab are supported